How to Cut a 10 Inch Hole in Wood
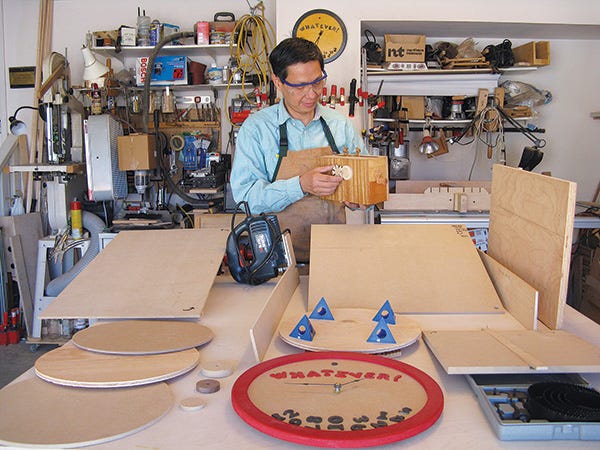
A round up of some obvious (and not so obvious) techniques for cutting a circle in a woodworking shop.
As a woodworker and mechanical sculpture maker, I often make circles and discs. Whether they are for a shop clock, lazy Susan finishing turntable, cams, round tabletops or used as toy wheels, my goal is the same: I want them made true, and precisely the size I want them to be — in a safe and efficient manner.
I don't know how many ways there are to skin a cat (my apologies to all cat lovers), but I do know, and use, more than half a dozen different ways to cut circles. In this article, I have selected six methods from my bag of tricks. I'll show you both how they work and how to get the best results from each technique. I'll also share tricks for cutting circles without leaving any pivot holes on the finished piece. So if you've ever been challenged by circle cutting, here are some tool options to try.
Hole Saws
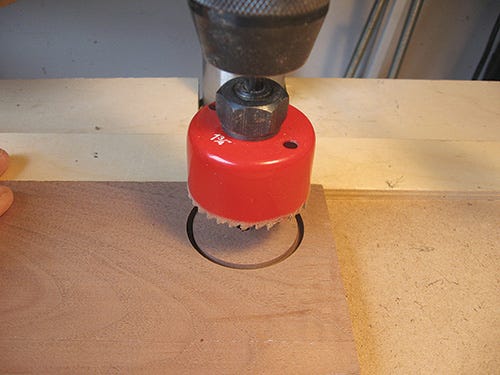
What has to be the world's simplest way to make small circles (from 3/4" up to 7" diameter) is to use a hole saw and a backer board (to prevent blowout). Apart from the backer board, I have two other drilling tips to share.
First, did you know that you can double the cutting depth of a hole saw? Here's how: Start drilling with the hole saw on one side of the workpiece and, once the pilot bit has poked through, flip the wood over and continue cutting using the same pilot hole. Second, the key to cutting a burn-free disc is to start with a sharp hole saw and don't force the saw into the wood. Let the teeth cut slowly. Retract the hole saw often to reduce friction and help clear the sawdust.
Belt/Disc Sander
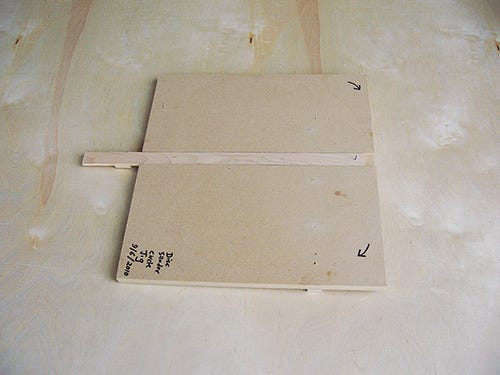
With the aid of a jig, your disc sander can be turned into a circle-making tool. The sanding circle jig I have is relatively simple. Start with a piece of 1/2" or 3/4" plywood that's a little bigger than the table of the disc sander. Position and glue a cleat to the bottom face of the plywood base such that when the cleat is in the miter slot, it positions the base about 1/16" from the sanding disc. Cut a dado on the top surface perpendicular to the underside cleat, and fit a runner into the dado. To complete the jig, insert a finish nail near one end of the runner. You can see my completed jig in the photo.
To cut a circle, clamp the jig to the table of the disc sander with the cleat in the miter slot. Drill a small hole in the center of the bottom face of the workpiece and fit the workpiece over the finish nail. Push the runner forward until the workpiece contacts the spinning sanding disk, then clamp the runner in place. Sand the workpiece by slowly rotating it clockwise until a circle is formed. Reset the runner forward and sand the edges of the circle in the same manner until you reach the desired circle diameter.
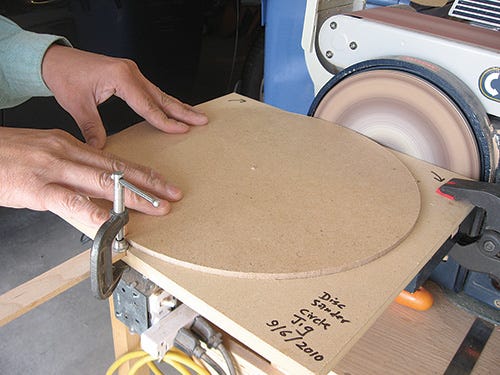
To avoid excessive burns on the edges, rotate the workpiece steadily and use a clean sanding disc. I clean mine periodically with a crepe block. I have also found that positioning the workpiece and jig closer to the center of the sanding disc, where it spins more slowly, helps reduce endgrain burning.
Band Saw
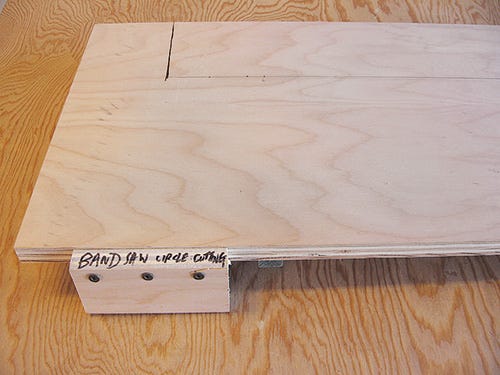
Cutting out circles on a band saw with a jig works on the same principle as the disc sander method. The workpiece turns on a pivot pin, and rotating it into the saw blade cuts a circle. If you need a quick, simple circle jig, start with a 3/4" plywood base roughly the size of the band saw table with a miter slot cleat glued to the bottom. Place the cleat in the miter slot and push the jig into the spinning blade until the base's back edge is flush with the table edge. Then attach a block underneath to stop the jig here. Draw a line across the jig that's perpendicular to the blade and even with the tips of the teeth — here's where you'll insert a finish nail pivot.
To use the jig, drill a small hole on the bottom of the workpiece at its center and place it over the finish nail installed in the jig. Push the jig forward on the saw table until it stops, and clamp it in place. Now rotate the workpiece clockwise into cross grain first (so the blade doesn't pull into long grain) to cut out a circle. Use a side table if needed to help support large workpieces.
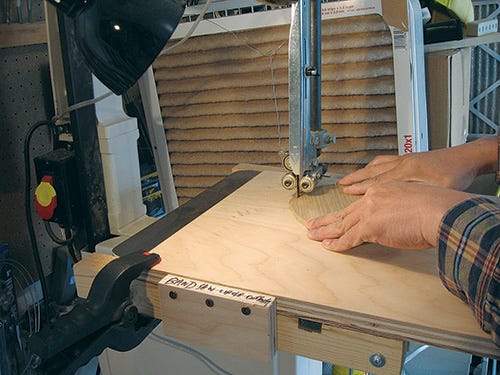
Having cut many circles on my band saw, I have some proven pointers to share. First, use a sharp and properly tensioned blade. I'll suggest a 1/8"- or 1/4"-wide blade to help you steer through smaller circles with tighter curves. Second, position the blade guides and thrust bearings close to the blade, to keep the blade from twisting during cutting. Then, make sure the cutting edge of the teeth aligns perfectly with the centerline of the pivot point on the jig, or the circle will not be true. Finally, orient the workpiece so knots in softwood are clear of the blade's cutting path.
Router and Trammel
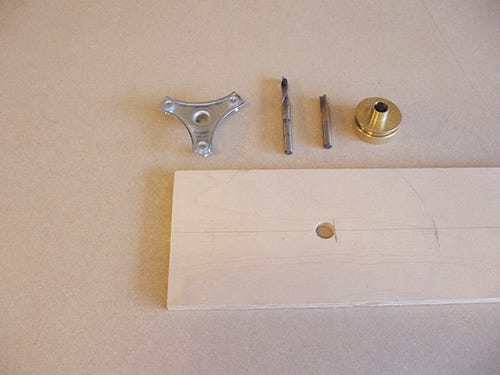
I'm sure you already know how to draw a circle with a string and a pencil. The principle behind the use of a router and a trammel to make circles is the same. Just look at the trammel as the string and the router bit as the pencil. You can buy an aftermarket trammel, but if you have 11 minutes to spare — and who doesn't — why not make your own for free? Cut a 4" x 24" arm from 1/4" plywood scrap (5 minutes), drill a 1/2" center hole 4" from one end for the guide bushing (5 minutes), and draw a center line from the hole to the other end (1 minute). You're done!
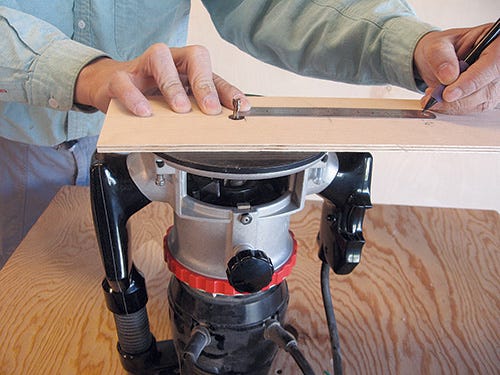
Next, install a 1/2" O.D. guide bushing and a straight bit or up-cut spiral bit in a router and place the router in the jig. Measure the desired radius from the cutting edge of the bit and insert a finish nail through the jig's arm.
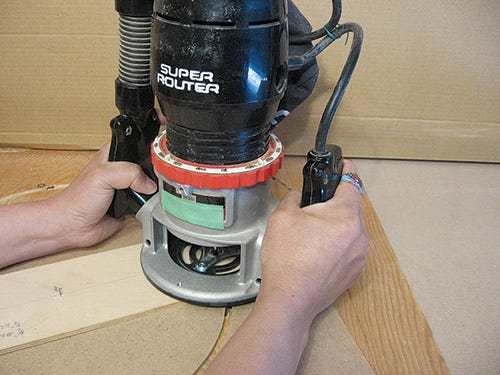
To use the trammel, insert a finish nail through the arm to mark the circle radius you need, and drill a small hole into the center of the workpiece. Install the trammel pivot in the workpiece. I also usually place a sacrificial board underneath the workpiece. Rout down into the workpiece in a counterclockwise direction. If the workpiece is thicker than 1/4", make multiple passes to cut out the circle.
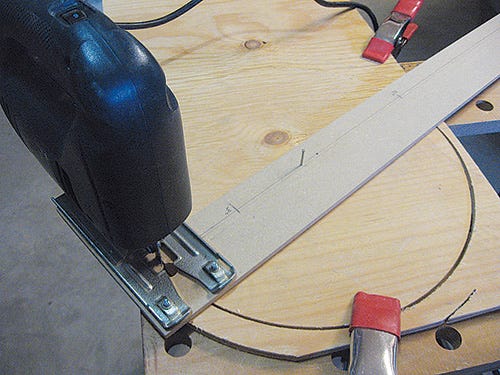
In place of a router, you can also accomplish the trammel technique with a jigsaw mounted to a long plywood or MDF arm. I favor this setup for shop projects when the quality of the circle's edge is not that critical.
Table Saw
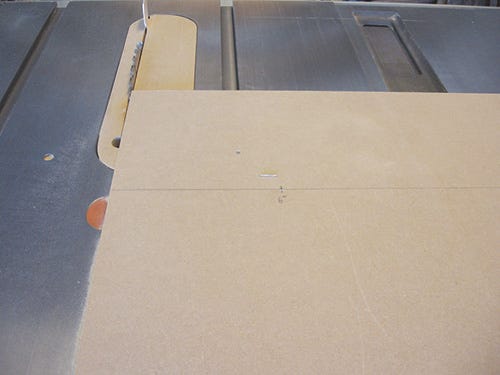
Believe it or not, a table saw can produce very smooth and clean circles safely, and it handles thick stock very well, too. In this technique, you use a sliding jig and, rather than creating a circle in one step, you progressively change the shape of a workpiece into a circle.
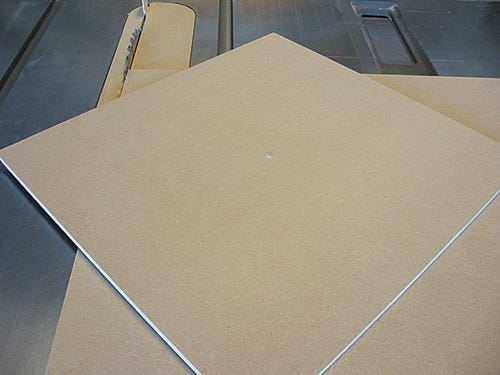
The sliding jig is just a panel-cutting jig, but without the fence. Cut a piece of 1/2" or 3/4" plywood or MDF to about 20" by 20" and attach a hardwood runner to the bottom face that fits into your table saw's miter slot. Place the jig in the right-side miter slot and cut away the overhang. Now draw a line across the jig, perpendicular to the blade, for setting radii with a pivot pin.
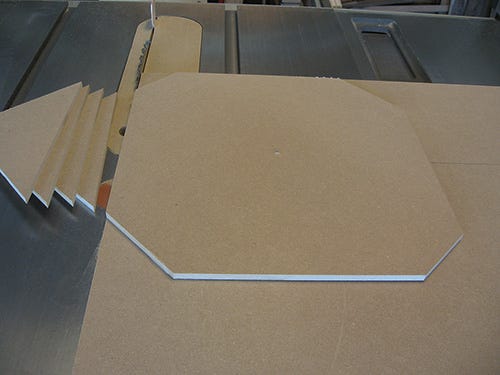
To use the jig, start with a roughly square workpiece and drill a small hole at its center, underneath. Next, measure and mark the desired radius from the blade on the line and insert a finish nail at the mark. Place and rotate the workpiece on the jig so one corner overhangs the jig's edge. Hold down the workpiece with your hand or a toggle clamp and slide the jig forward to trim the corner. Then slide the jig back, rotate the workpiece to expose a new corner, and cut the second corner.
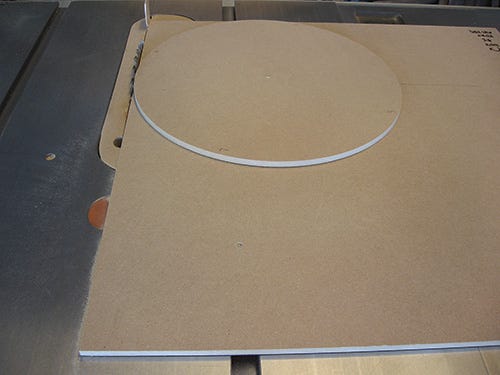
Keep sawing off more corners of the piece to form an octagon, then a 16-sided piece, and so on until it is roughly round. In the final step, set the sliding jig with the perpendicular line beyond the front teeth of the blade. Now rotate the piece clockwise to true the piece into a perfect circle. How slick is that?!
Router Table
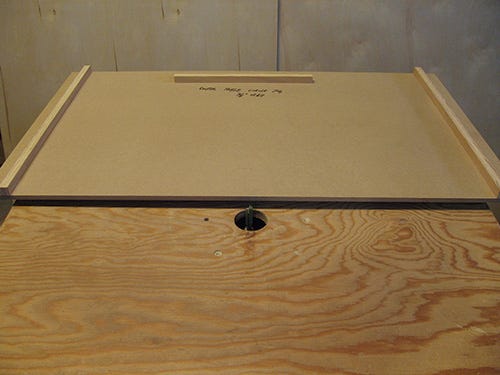
The last method, one that I have developed and published as a shop tip, can handle small and large circles alike on the router table. It involves using a sliding jig on the router table and a 1/2"-dia. spiral or straight bit. My method offers two unique features compared to the trammel method: 1) You can make the cut in increments without the need to adjust the bit height; and 2) You can cut circles of different diameters without moving the pivot pin mounted in the jig.
To make the sliding jig, cut a 1/4" or 1/2" plywood or MDF board several inches longer than your router table's top and about half as wide. Attach a pair of side cleats and a stop cleat underneath the board. Position the stop cleat such that the bit's cutting edge just touches the jig's front edge. Insert a pivot finish nail into the jig's top face 1" from the front edge.
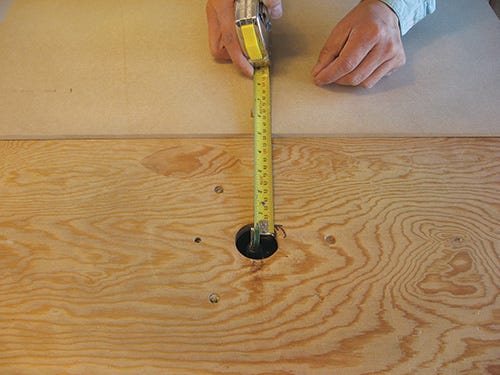
To make the circle, place the jig on the router table so the center of the finish nail and the router bit's closest edge to it are separated by the desired radius. Install a clamp on the router table as a stop block for the jig. Drill a small center hole in the bottom face of the workpiece and place it on the finish nail. Then, hold down the workpiece and gradually slide the jig forward until it hits the stop block. Just rotate the workpiece counterclockwise against the bit to rout the circle in one pass.
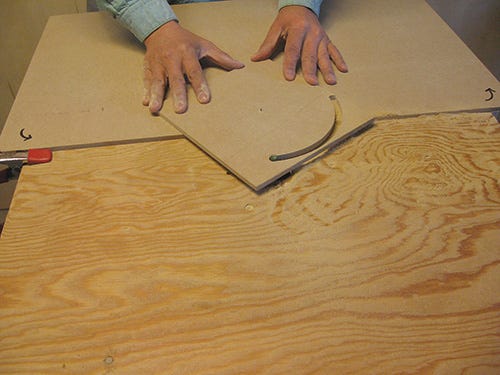
If you need to make a different circle, whether larger or smaller, simply reposition the stop block to change the desired radius between the pivot nail and the bit. Then rout as previously described.
No Centerpoint Circles
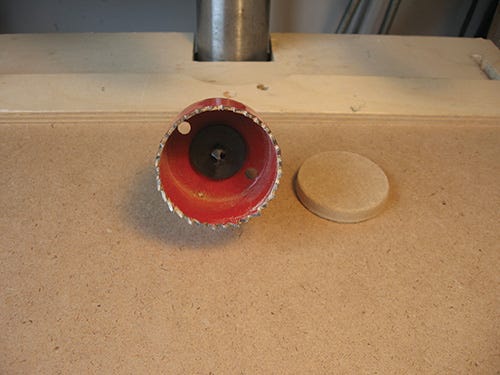
Sometimes, your projects may require circles without centerpoint holes in them. If you use a hole saw, you can eliminate that middle hole by retracting the pilot bit in the arbor so the bit doesn't contact the wood when drilling. However, this will require that you use a drill press for cutting the circle instead of attempting it freehand with a handheld drill — there won't be any guide for the hole saw with the pilot bit retracted. Be sure to clamp the workpiece down securely to your drill press table and against a sturdy fence. Otherwise, the spinning saw will probably grab and spin the workpiece out of your hand and then throw it from the table or even straight into you — definitely not good!
For the other techniques I've shared here, you can avoid centerpoint holes in the final circle by double-face taping a scrap board to the workpiece and drilling the pivot hole into the scrap board only. Remove the scrap board after the circle is made and voila! No centerpoint.

So, there you are: a full arsenal of proven circle-cutting techniques and tips at your disposal! As a general guideline, I have also compiled a summary table to help you select the circle-cutting methods that might best suit your projects. Build the jigs, practice the cuts, and soon you'll find yourself making a lot of circles (and you can always find good uses for them).
How to Cut a 10 Inch Hole in Wood
Source: https://www.rockler.com/learn/six-circle-cutting-techniques